Convert SwiftUI views to PDF using ImageRenderer in SwiftUI
Dec 14, 2023
Apple unveiled a fresh API named ImageRenderer in iOS 16, enabling swift conversion of SwiftUI views into images and .pdf files. This addition simplifies the process of creating top-notch images from your SwiftUI designs.
Let's explore it!
Converting Views to Images
By definition, it is an object that can create / generate images from SwiftUI views.
final class ImageRenderer<Content> where Content : ViewTo use ImageRenderer, we need to instantiate an instance of it with the content that is a View which we want to convert into an image.
let renderer = ImageRenderer(content: yourView) Once we have the ImageRenderer instance, we then can access the generated image using the cgImage or uiImage property from it:
let cgImage = renderer.cgImage
let uiImage = renderer.uiImage
Now let's think what will the use cases of it? We iOS developers usually import or download images then present them inside our application as a view using Image in SwiftUI or UIImage in UIKit.
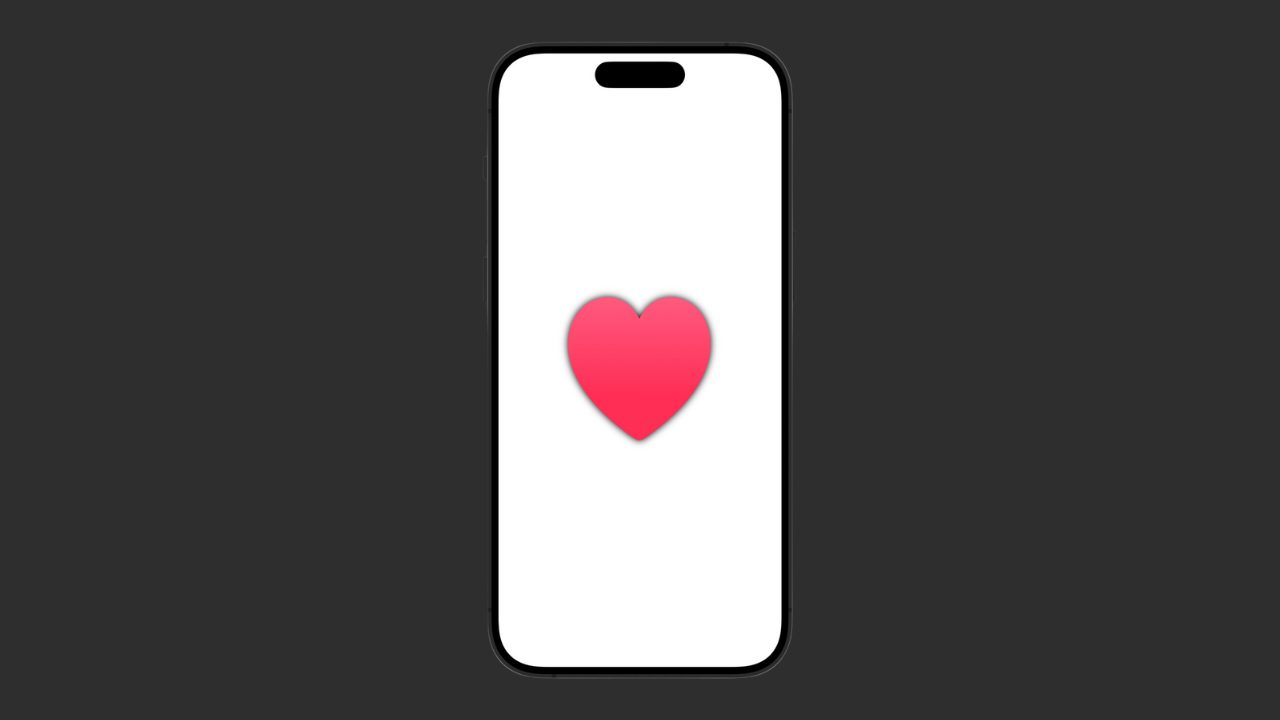
The most common seen one is sharing something cool that draw in our application. For example:
struct ImageRendererView: View {
    var body: some View {
        let heart = Image(systemName: "heart.fill")
            .resizable()
            .frame(width: 200, height: 200)
            .frame(maxWidth: .infinity, maxHeight: .infinity)
            .foregroundStyle(.pink.gradient)
            .shadow(color: .black, radius: 5)
              .padding()

        VStack {
            heart
        }
    }
}
Result:
Here we have a beautiful heart image and we want to share it with our love. Then it is a great chance to use ImageRenderer:
VStack {
    heart

    let renderer = ImageRenderer(content: heart)
    if let uiImage = renderer.uiImage {
        let image = Image(uiImage: uiImage)
        ShareLink(item: image, preview: SharePreview("Heart", image: image))
    }
}
Also available from iOS 16, ShareLink offer us a native SwiftUI way to share data. Here we use ImageRenderer to generate the heart image from our view, then share it:
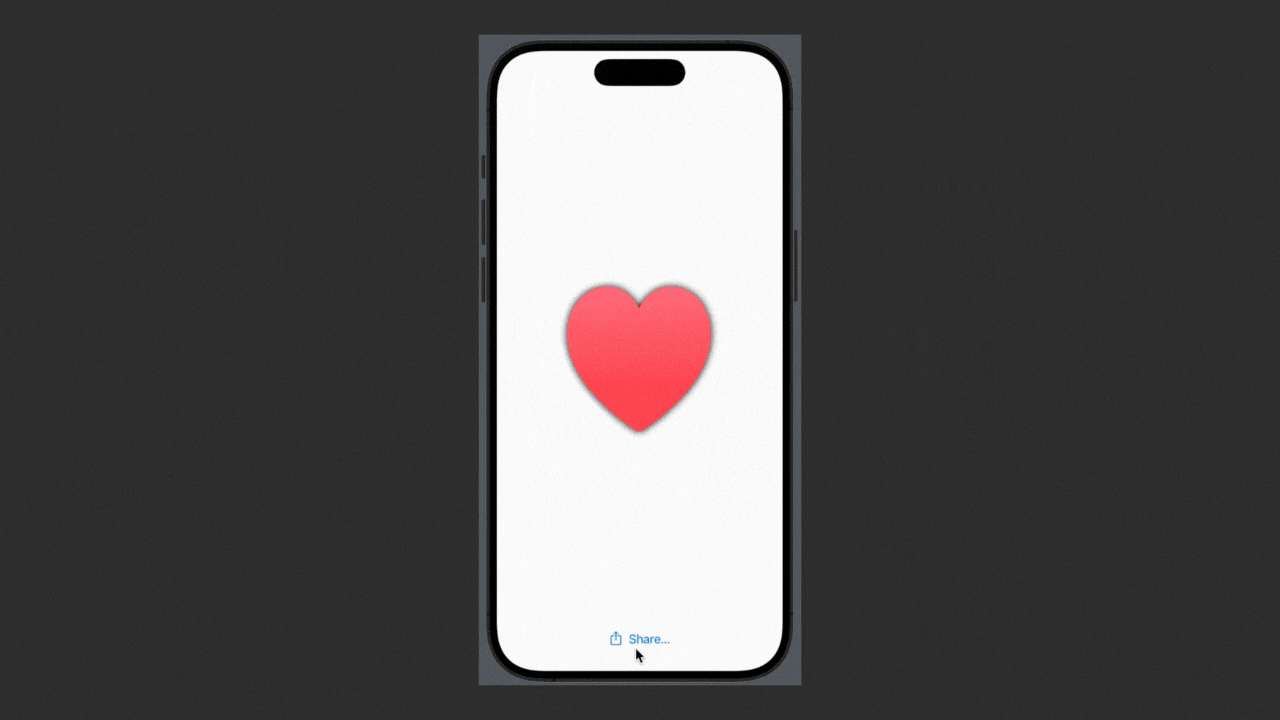
When users tap on the share link, it presents a share sheet for users to share content to other applications or copy the data for later use:

Through the combination of drawing on a Canvas and utilizing an ImageRenderer for export, you gain the ability to create images from programmatically-rendered content, encompassing elements such as paths, shapes, gradients, and beyond.
For example that inside our application there is a beautiful flower:
var body: some View {
    let flower = YellowDaisyFlower().frame(width: 300, height: 300)
    VStack {
        flower

        let renderer = ImageRenderer(content: flower)
        if let uiImage = renderer.uiImage {
            let image = Image(uiImage: uiImage)
            ShareLink(item: image, preview: SharePreview("Daisy Flower", image: image))
        }
    }
}
Result:
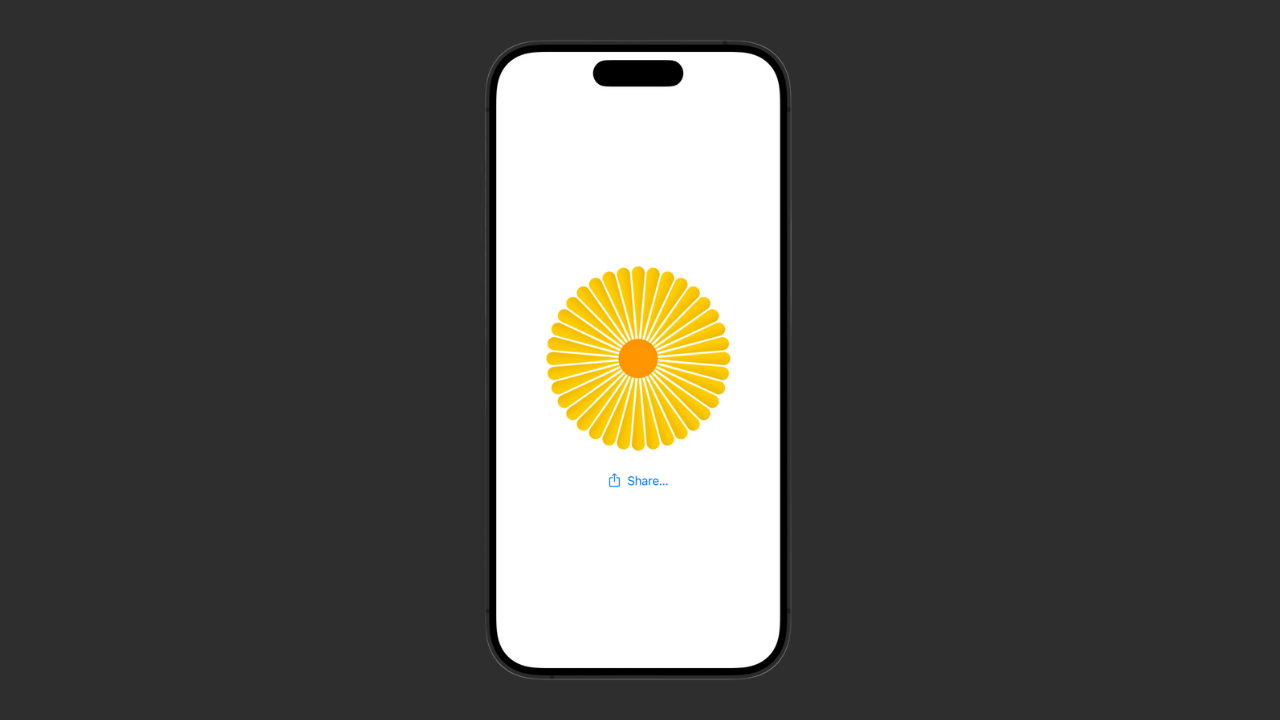
We can then generate to have a beautiful picture from it:

To learn more about Shape and how to leverage its power to draw this beautiful flower, check our article here: Custom Shapes in SwiftUI.
It's worth noting that you can adjust the scale of the rendered image using the scale property of ImageRenderer. By default, the scale is set to 1.0, but you can increase it to generate higher-resolution images.
renderer.scale = 2.0
Rendering Views to PDF
Yes, the ImageRenderer in iOS 16 can render PDF documents. You can use it to convert SwiftUI views into PDF files.
With the render(rasterizationScale: _, renderer: _) method, you can render the designated view onto any CGContext, extending beyond the creation of a rasterized CGImage.
Here's how:
- Decide which views to render as PDF.
- Create a
URLwhere SwiftUI can write the PDF data. - Instantiate an
ImageRendererinstance with the desired view as the content. - Call the
render()method on the ImageRenderer to start the rendering process.
Let's see with an example:
struct ImageRendererPDFView: View {
private var chartView: some View {
VStack(spacing: 24) {
PieChartView()
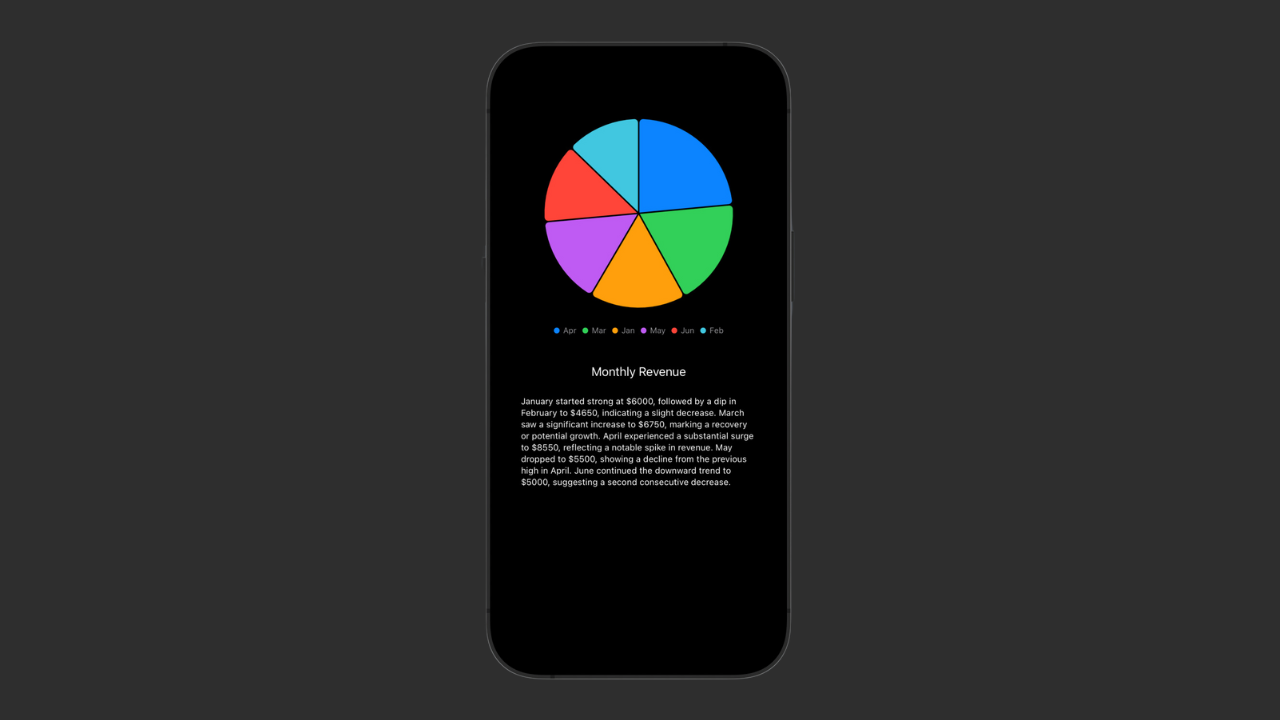
Text("Monthly Revenue")
Text("January started strong at $6000, followed by a dip in February to $4650, indicating a slight decrease. March saw a significant increase to $6750, marking a recovery or potential growth. April experienced a substantial surge to $8550, reflecting a notable spike in revenue. May dropped to $5500, showing a decline from the previous high in April. June continued the downward trend to $5000, suggesting a second consecutive decrease.")
.font(.caption)
.padding(.horizontal)
}
.padding()
}
var body: some View {
GeometryReader { geometry in
let size = geometry.size
chartView
}
Result:
Inside our app, we have a beautiful representaion of monthly revenue data. To learn more about SwiftUI Charts framework, check our article here: Charts in SwiftUI
It would be much better if user can save and export this about as a PDF report. And we will achieve it with ImageRenderer.
We use GeometryReader here to get the size provided to our chartView which we will then use to generate the same specific PDF size.
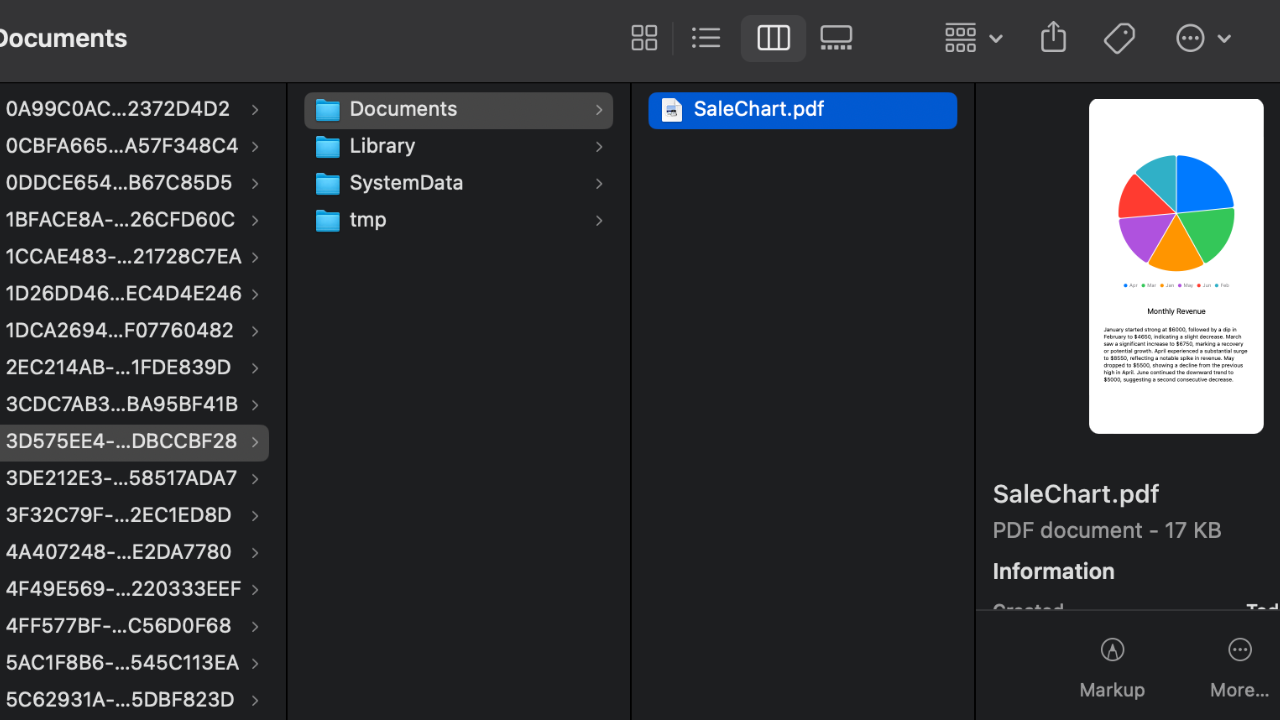
We will generate our chartView to PDF and save it to app sandbox with the help of FileManager.
let url = FileManager.default
    .urls(for: .documentDirectory, in: .userDomainMask)
    .first!
    .appending(path: "SaleChart.pdf")
This create a URL pointing to a file named "SaleChart.pdf" within the document directory of the app's sandboxed file system.
Next, we initailize our renderer instance passing the chartView as the content with specific size received from GeometryReader:
let renderer = ImageRenderer(content: chartView.frame(width: size.width, height: size.height, alignment: .center))Then we set up a Core Graphics context for drawing into a PDF file at the previously defined url:
if let consumer = CGDataConsumer(url: url as CFURL), let context = CGContext(consumer: consumer, mediaBox: nil, nil) {
    renderer.render { size, renderer in
        var mediaBox = CGRect(origin: .zero, size: size)
        // Drawing PDF
        context.beginPage(mediaBox: &mediaBox)
        renderer(context)
        context.endPDFPage()
        context.closePDF()
        // Updating the PDF URL
        print(NSHomeDirectory())
    }
}
ImageRenderer will render the content of the chartView into the PDF context.
Let's generate our PDF simply when our view appear:
var body: some View {
    GeometryReader { geometry in
        let size = geometry.size
        chartView
            .onAppear {
                let url = FileManager.default
                    .urls(for: .documentDirectory, in: .userDomainMask)
                    .first!
                    .appending(path: "SaleChart.pdf")

                let renderer = ImageRenderer(content: chartView.frame(width: size.width, height: size.height, alignment: .center))

                // Generating PDF
                if let consumer = CGDataConsumer(url: url as CFURL), let context = CGContext(consumer: consumer, mediaBox: nil, nil) {
                    renderer.render { size, renderer in
                        var mediaBox = CGRect(origin: .zero, size: size)
                        // Drawing PDF
                        context.beginPage(mediaBox: &mediaBox)
                        renderer(context)
                        context.endPDFPage()
                        context.closePDF()
                        // App's home directory.
                        print(NSHomeDirectory())
                    }
                }
            }
    }
}
Run it on the simulator and you can see App's home directory being printed out after the process finished. Copy that and paste to the Terminal with the open command to see the specific location:
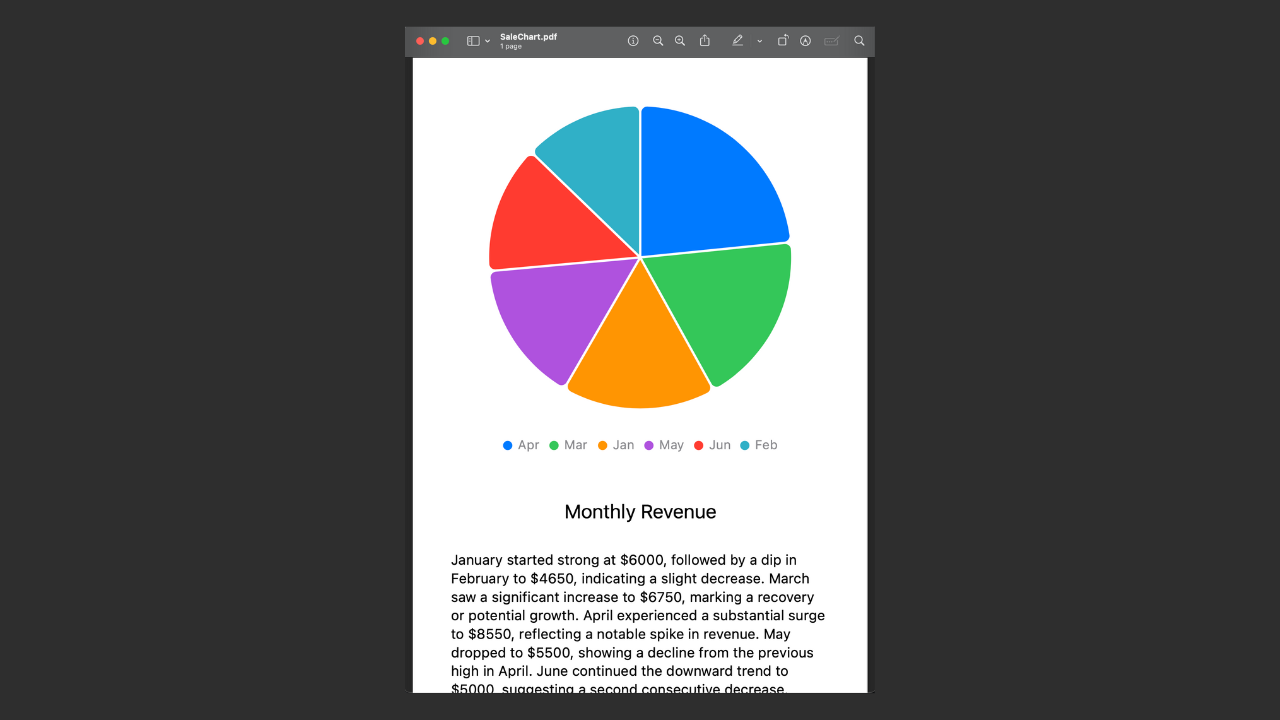
Hola we a beautiful PDF that can be share and mail to our boss now:
Important
It doesn't render views from native platform frameworks like AppKit and UIKit, such as web views, media players, and certain controls. In place of these un-rendered views, ImageRenderer shows a placeholder image.
Conclusion
ImageRenderer significantly simplifies the process of converting SwiftUI views into images and PDF documents. You have already learned all about it in this article.
Its integration enables developers to easily create visual assets from SwiftUI designs, empowering them to share, export, and present content in a more visually appealing and versatile manner.
Signup now to get notified about our
FREE iOS Workshops!
